





















 Login
Login




Products
Solutions
Applications





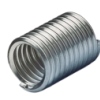
Thread inserts, also known as wire thread inserts, are high-precision, high-strength internal threaded fastening components. They can effectively repair damaged internal threads and significantly improve the thread connection strength and wear resistance of low-strength materials such as aluminum alloys and magnesium alloys. Shenzhen Yongjing Precision Technology Co., Ltd. provides you with a comprehensive guide to thread insert installation and maintenance.
I. Types and Advantages of Thread Inserts
Types: Mainly divided into free-running types and locking types. Locking types feature a polygonal structure in one or more coils in the middle, providing anti-loosening functionality.
Advantages:
Enhanced connection strength: Forms wear-resistant threads in soft base materials, improving tensile, shear, and fatigue strength.
Thread repair: The most economical and effective method for repairing stripped or damaged threads.
Improved load distribution: Evenly distributes concentrated stress, extending base material life.
Anti-loosening and vibration resistance: Locking-type thread inserts offer excellent anti-loosening performance.
Wear and corrosion resistance: Typically manufactured from stainless steel or high-temperature alloys, with service life far exceeding that of the base material.
II. Thread Insert Installation Steps
Installation requires specialized tools and follows the process of drilling, tapping, installing, and tang removal.
1. Drilling:
Use a standard drill bit according to the pilot hole size specified for the thread insert specification.
The drilling depth should be at least 1.5–2 thread pitches deeper than the installed length of the insert to ensure smooth chip evacuation and complete insertion.
2. Tapping:
Use the special tap designed for the thread insert. Never use a standard tap.
Ensure the tap remains perpendicular to the base material surface during tapping.
The tapping depth should allow the insert to sit 0.25–0.5 thread pitches below the base surface after installation.
After tapping, thoroughly clean all metal chips from the hole using compressed air or cleaning solvent.
3. Installation:
Insert the pilot tip of the installation tool into the guide ring of the thread insert.
With the tang end facing the guide tool, lightly insert the insert into the mandrel of the installation tool so it engages in the guide sleeve slot.
Align the assembled insert and tool vertically over the pilot hole, turn the handle clockwise, and smoothly thread the insert into the pilot hole until the insert end face is below the workpiece surface.
Key point: Stop when the insert is 0.25–0.5 thread pitches below the surface; the tang should now be positioned directly above the guide ring.
4. Tang Removal (Removing the Guide Ring):
Immediately after installation, use a tang removal tool (punch-off tool) or a dedicated sleeve to break off and remove the tang at the guide ring of the thread insert.
This is a critical step—failure to remove the tang will prevent the bolt from being threaded in.
III. Common Problems and Solutions
Problem 1: Insert dislodges or fails to install properly
Causes: Insufficient pilot hole depth; insufficient tapping depth; angled installation; worn installation tool.
Solutions: Check and correct pilot hole and tapping depths; maintain vertical installation; replace tools.
Problem 2: Tang difficult to remove
Causes: Installation too deep, causing guide ring deformation and jamming; improper tang removal tool.
Solutions: Control installation depth; use the correct punch-off tool, aligning it with the notch and striking firmly.
Problem 3: Bolt cannot be threaded in
Causes: Tang not removed; poor tapping quality with debris remaining; insert twisted inside the hole.
Solutions: Confirm that the tang has been removed; re-clean the threaded hole; if the insert is damaged, use a removal tool to extract it and install a replacement insert.
IV. Maintenance and Removal
Routine inspection: Periodically inspect thread inserts in critical areas for signs of loosening or corrosion.
Removal: When a thread insert needs replacement, use a dedicated removal tool. Insert the tool's tip into the removal slot at the rear end of the insert and turn counterclockwise to extract the insert completely without damaging the base thread.
Reuse: As a general practice, it is recommended to replace thread inserts with new ones to ensure connection reliability.
Conclusion
Proper installation is the prerequisite for thread inserts to deliver their outstanding performance. Shenzhen Yongjing Precision Technology Co., Ltd. not only offers high-quality stainless steel and high-temperature alloy thread inserts but also provides complete installation tool kits (including taps, installation tools, and tang break-off tools). Our technical support team can provide on-site guidance or training to ensure your installation work is efficient and precise.
Professional consultant team online, ready to provide solutions for you
Contact NowProducts
Solutions
Applications
Contact
 Contact
 WeChat
Contact: Manager Fan - Tel/WeChat: 135-6073-0094 Email: Flora.Fan@toprecision.com | Manager Ao - Tel/WeChat: 13560729614 Email: Olia.Ao@toprecision.com
Sales Director: Mr. Zhang - Tel: 13510369429 Email: xiaowei.zhang@zcjtech.com
© Copyright 2011 - 2026 Shenzhen Toprecision Precision Technology Co., Ltd. All Rights Reserved.
 粤ICP备2025493240号-1


Cutter Screws
Thread Inserts
Sealing Products
Riveting Products
Locking Products
Direct Assembly
SMT Components
Precision Screws
Screwdriver Bits